JACK (JACK Audio Connection Kit) and related
tools
Vicente González Ruiz
December 3, 2014
Contents
Chapter 1
The server
1.1 What is JACK?
- JACK is a sound system (audio server) for POSIX operating systems (such
as Linux, FreeBSD, MacOS X and Windows XP).
- It is a software layer between the kernel (ALSA) and the applications that
requires to access to the sound hardware.
- Licensed under LGPL.
1.2 Functions
- Controllable latency (suitable real-time audio applications).
- Allow to define the connections (audio flows) between JACK-client
applications (like in a real mixer desk).
- Transport control synchronization. JACK can send timming events (using
the JACK transport control system) to the rest of clients in order to
synchronize them.
- MIDI capabilities.
1.3 Installation
- Install the program qjackctl. This a graphical front-end for controlling
the audio server jackd2. During the installation of jackd you must decide
to enable the realtime process priority (necesarry for real-time processing
in slow systems). The priority is defined in the file:
$ cat /etc/security/limits.d/audio.conf
# Provided by the jackd package.
#
# Changes to this file will be preserved.
#
# If you want to enable/disable realtime permissions, run
#
# dpkg-reconfigure -p high jackd
@audio - rtprio 95
@audio - memlock unlimited
#@audio - nice -19
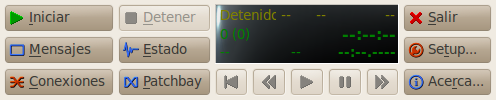
1.4 JACK graphical front-end: qjackctl
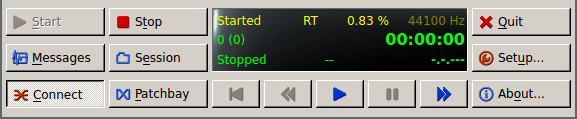
- Provides a simple GUI dialog for setting several JACK daemon parameters,
which are properly saved between sessions, and a way control of the status of
the audio server daemon. Run it with:
$ qjackctl &
- Control actions:
- Start: the server.
- Stop: the server.
- Quit: kill the server.
- Messages: from the server.
- Session: show/hide the session manager window.
- Setup: the server.
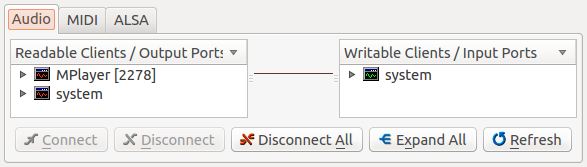
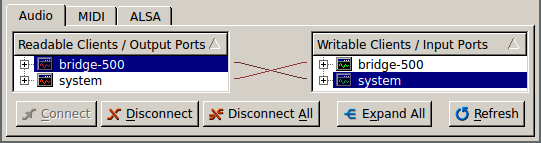
- Connect: the audio applications. Notice that all connections made
in the Connections interface are kept as long you don’t power-cycle
the JACK server (jackd). That is, all connections will be lost when
the JACK server or any of the client application programs are closed
or terminated.
- Patchbay: will keep all declared connections automatically, as long as
QjackCtl is kept alive. Moreover, you can declare typical connection
configuration that are carried out when the related clients are
executed.
- Play: start transport timming events.
- Pause: stop transport timming events.
- Forward: transport timming events.
- Backward: transport timming event.
- Rewind: transport timming event.
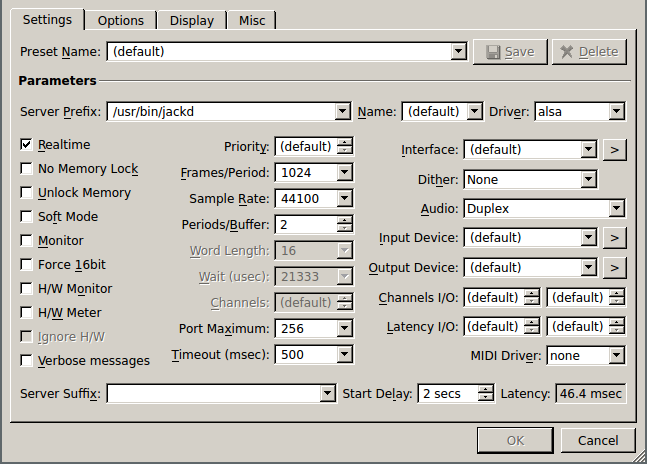
1.4.1 Server configuration
- Select the Setup form from the qjackctl application. Clicking in the ”Settings”
tab, you will obtain something like:
- Among others, the Setup window allows you to configure important
settings:
- Driver: the physical audio driver. On Linux, the default option is
ALSA.
- Realtime: although this option is selected as the default, it requires
a Real-time capable system to use. Unless you have configured your
operating system for Real-time, uncheck this option.
- Interface: select the physical audio device that you would like the
Jack server to communicate with (for example, a FireWire or USB
interface or the built-in audio of your computer). Currently, JACK
can only communicate with one hardware audio device at a time.
- Frames/Period: choose your desired audio buffer size (in
samples=frames). This paremeter controls the Latency.
- Sample Rate: choose your desired sample rate for the Jack server
and the rest of clients.
- Once you have chosen your settings, click on OK to exit the Setup window.
Note that however the new settings will be saved, you will have to restart the
JACK Server for the changes to take effect.
1.5 Minimizing the number of XRUNs
- When we play live music with a computer, it is very important a low
latency. This aspect can be controlled in the Setup section of JACK
modifying the buffer size.
- However, Linux is a multi-task OS and JACK competes for the same
resources that other applications. Therefore, when Jack does not gets
enough CPU a XRUN is provoked and the playback stutters.
- In order to minimize the number of XRUNs we should realise that:
- Run only the critical applications.
- The JACK server is running with the highest priority .
The current priority can be determined by:
X=‘ps
−C jackd
−o pid=‘; ps
−o nice
−p $X
And incremented with:
X=‘ps -C jackd -o pid=‘; sudo renice -20 -p $X
# Notice that renice only runs with administrator privileges!
- Configure, compile and boot a real-time kernel.
- Improve your sound hardware.
- Improve your computer hardware.
Chapter 2
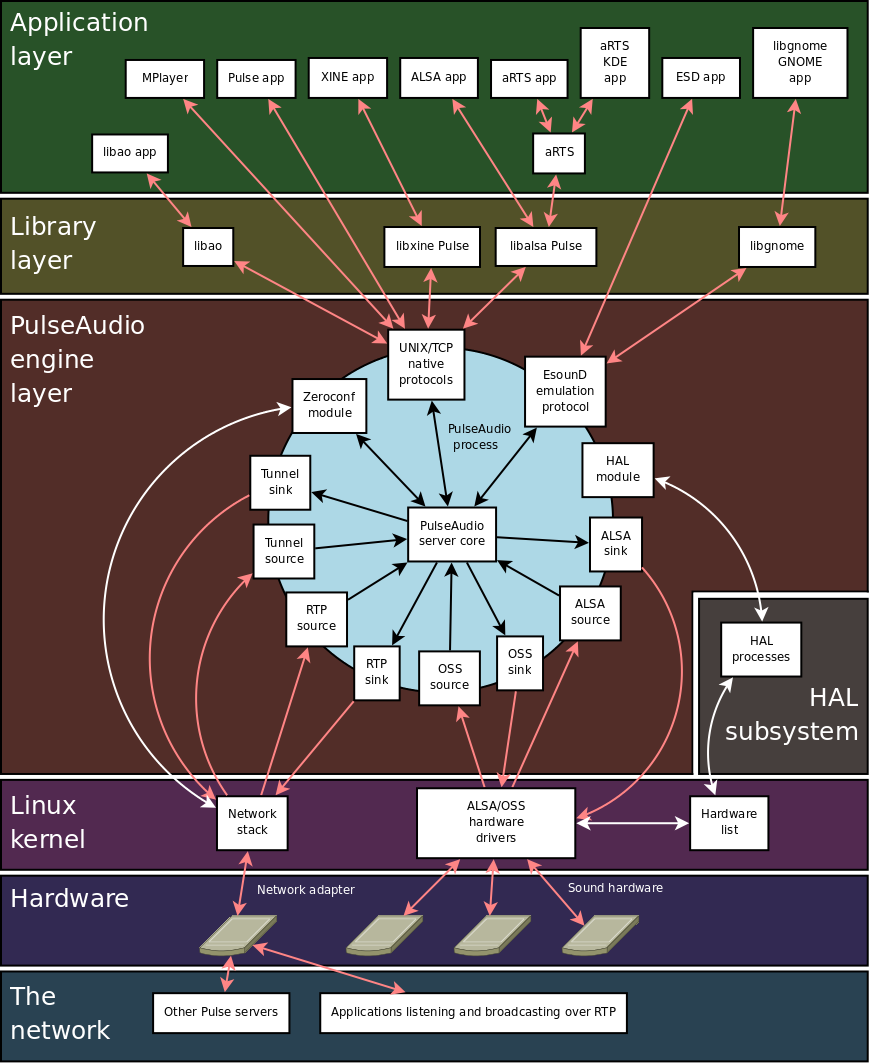
Living with PulseAudio
- Pulseaudio is a sound system (audio server) for POSIX operating systems
(such as GNU/Linux, Solaris, FreeBSD, NetBSD, MacOS X, Windows
2000 and Windows XP).
- It is a software layer between the kernel (ALSA) and the applications that
requires to access to the sound hardware.
- Architecture:
- Licensed under LGPL 2.1+.
- Currently, PulseAudio (PA) is used in most friendly Linux distributions
to multiplex the sound hardware between the applications that use
it.
- The server and clients does not need to run in the same host. This means that
one application that run in a remote host can play sound in the local host of
the user (that runs the server).
2.2 Functions
- Software mixing of multiple audio streams, bypassing any restrictions the
hardware has.
- Network transparency, allowing an application to play back or record audio
on a different machine than the one it is running on.
- Sound API abstraction, alleviating the need for multiple backends in
applications to handle the wide diversity of sound systems out there.
- Generic hardware abstraction, giving the possibility of doing things like
individual volumes per application.
2.4 Pulseaudio and ALSA tools
- By default, in most OSs, ALSA tools (such as arecord) has been
configured to access to the sound hardware thought Pulseaudio.
2.5 Bypassing PA server (and JACK)
pasuspender mplayer -ao alsa * &
2.6 Sound system usage
$ fuser -v /dev/snd/*
USER PID ACCESS COMMAND
/dev/snd/controlC0: vruiz 2201 F.... pulseaudio
vruiz 3810 F.... alsamixer
/dev/snd/pcmC0D0p: vruiz 2201 F...m pulseaudio
2.7 Configuration
PA is configured by modifiying the files:
/etc/pulse/daemon.conf
/etc/pulse/default.pa
2.8 Volume control
$ pavucontrol &
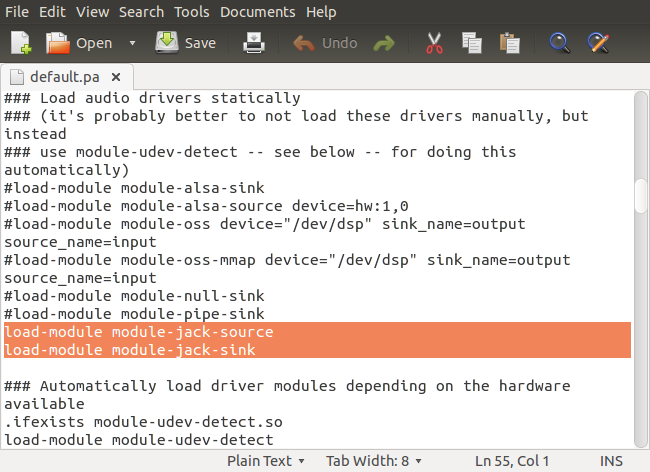
2.9 Module pulseaudio-module-jack
# Install the PulseAudio’s module for Jack
sudo apt-get install pulseaudio-module-jack
# Go to:
cd /etc/pulse/
# Make a backup of the file:
sudo cp default.pa default.pa.old
# Edit it:
sudo gedit default.pa
# Add:
#
# load-module module-jack-source
# load-module module-jack-sink
#
# after "load-module module-pipe-sink".
#
# Remember to remove the ’#’ of these lines!!
# Kill and reload JACK.
pulseaudio --kill
Chapter 3
Media players
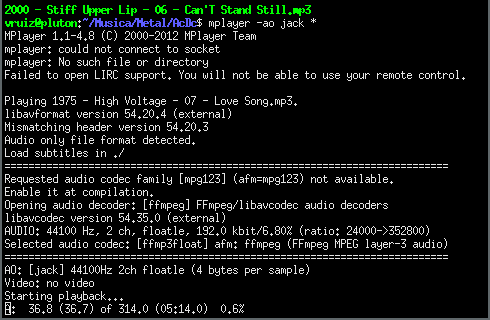
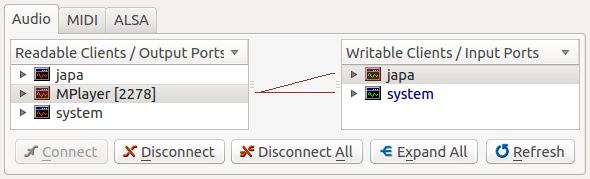
3.1 Media player: MPlayer
$ mplayer -ao jack * &
Chapter 4
Meters
4.1 A VU (Volume Unit) meter: meterbridge
- Run:
$ meterbridge -t vu alsa_pcm:capture_1 alsa_pcm:capture_2 & # Or ...
$ meterbridge -t ppm alsa_pcm:capture_1 alsa_pcm:capture_2 & # Or ...
$ meterbridge -t dpm alsa_pcm:capture_1 alsa_pcm:capture_2 & # Or ...
$ meterbridge -t jf alsa_pcm:capture_1 alsa_pcm:capture_2 & # Or ...
$ meterbridge -t sco alsa_pcm:capture_1 alsa_pcm:capture_2 & # Although this is preferable
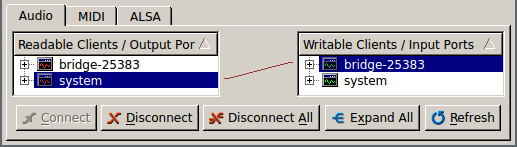
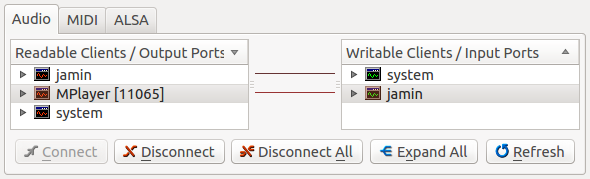
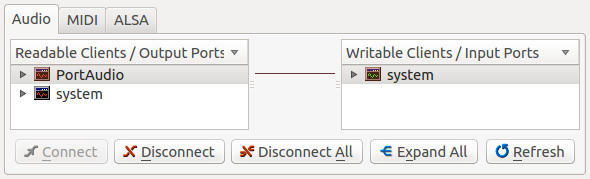
- Connect (route) it:
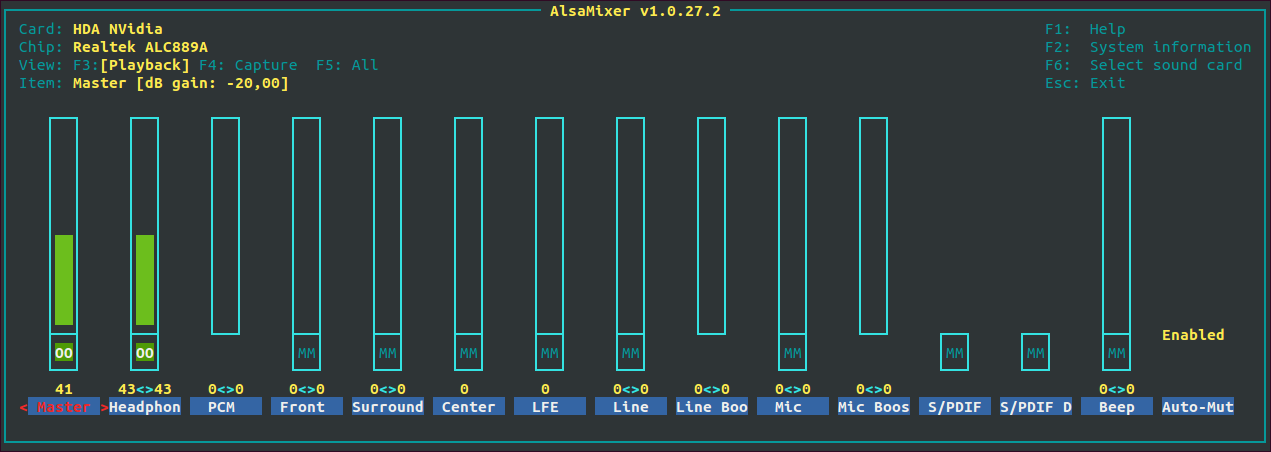
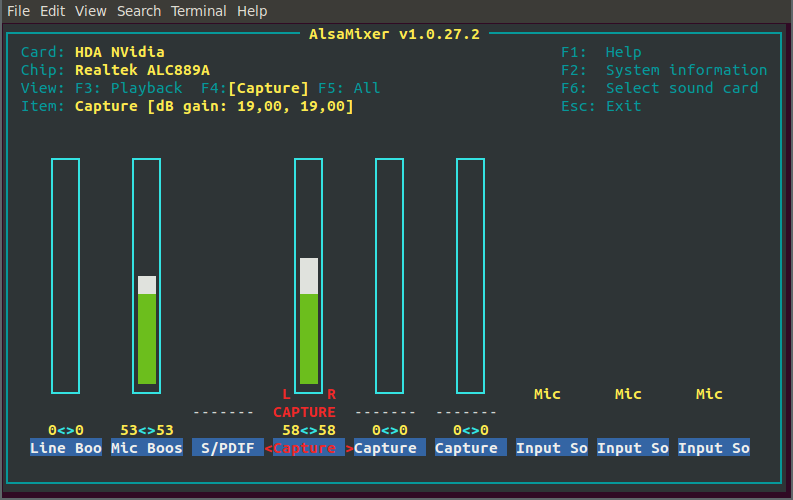
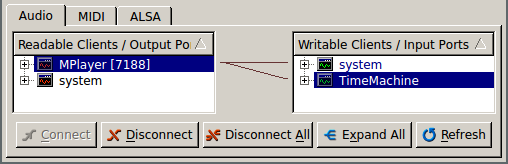
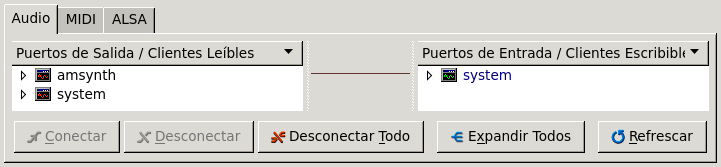
- But, I don’t listen myself! Of course, you have to route the system readable
client in the Connections/Audio window towards the system writable client in
order to provide this functionality. But be careful with the output volume of
the speakers (Master and PCM) and the microphone gain (Mic and Mic Boost)
mixer controls, specially is you are done this in a laptop, because the
microphone can be feedbacked by the speakers, producing an annoying sound
coupling. See below:
- Run as (while the JACK server is running):
$ japa -J &
Chapter 5
Effects
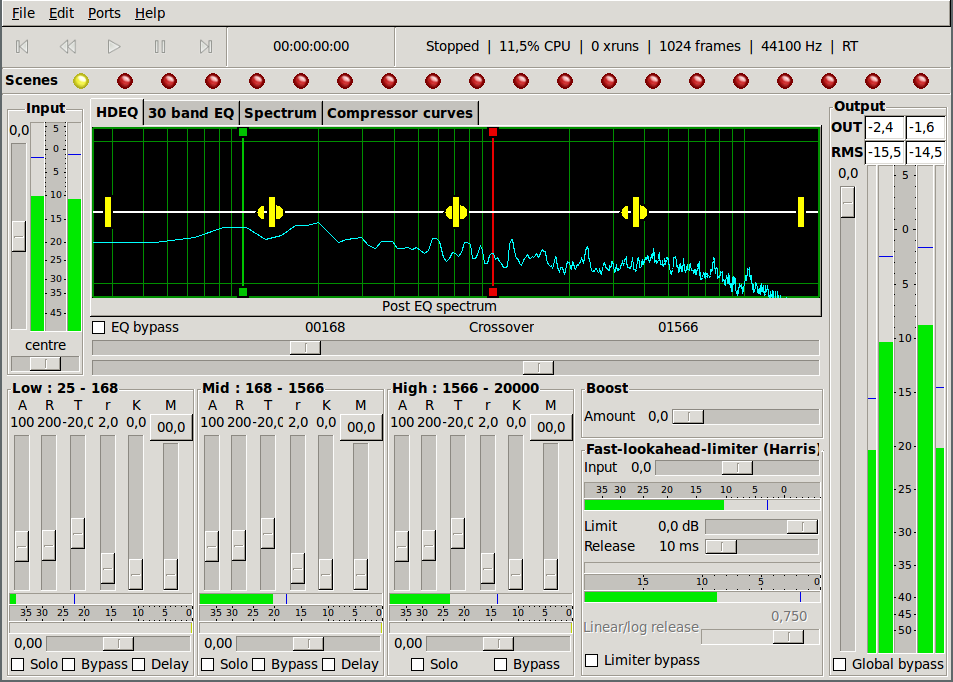
$ jamin &
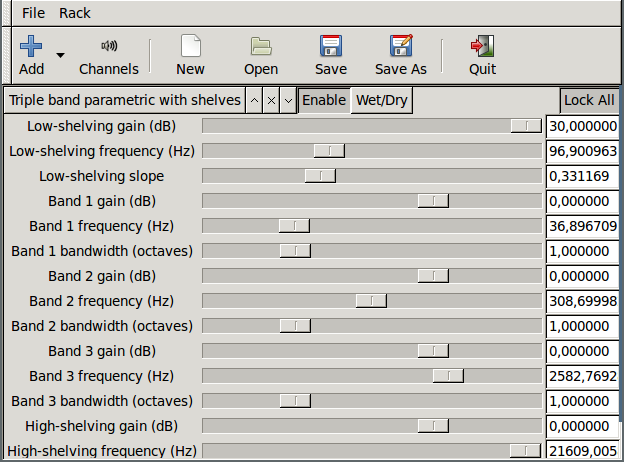
$ jack-rack &
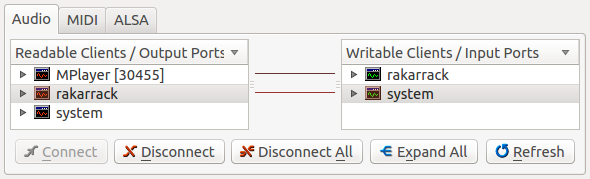
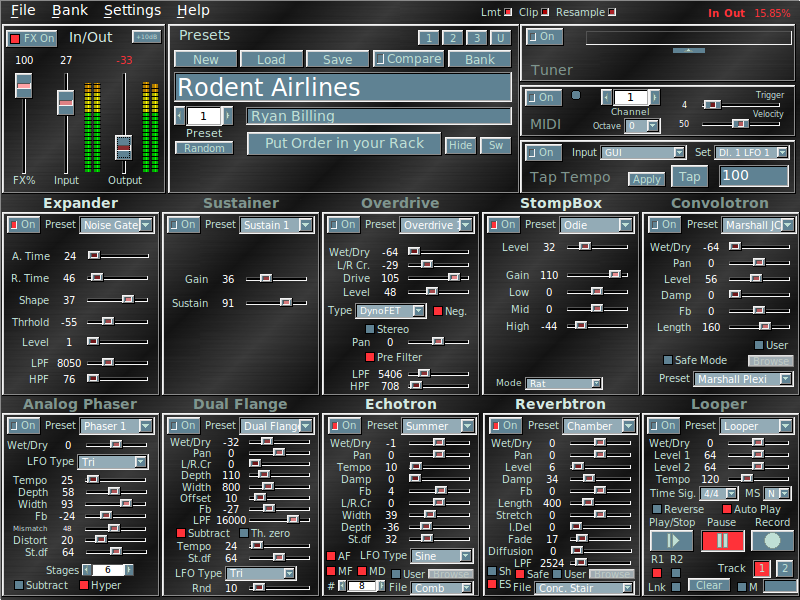
$ rakarrack &
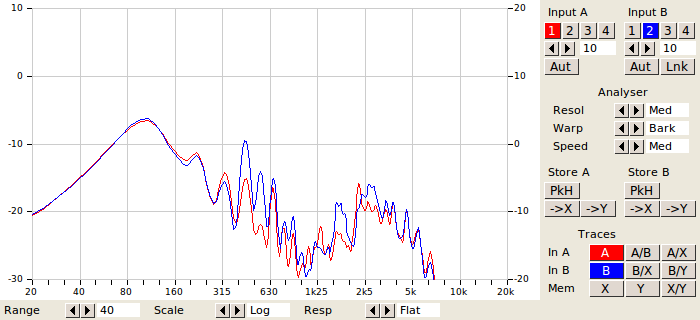
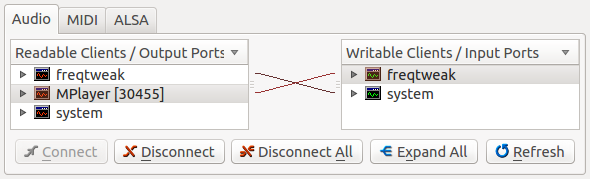
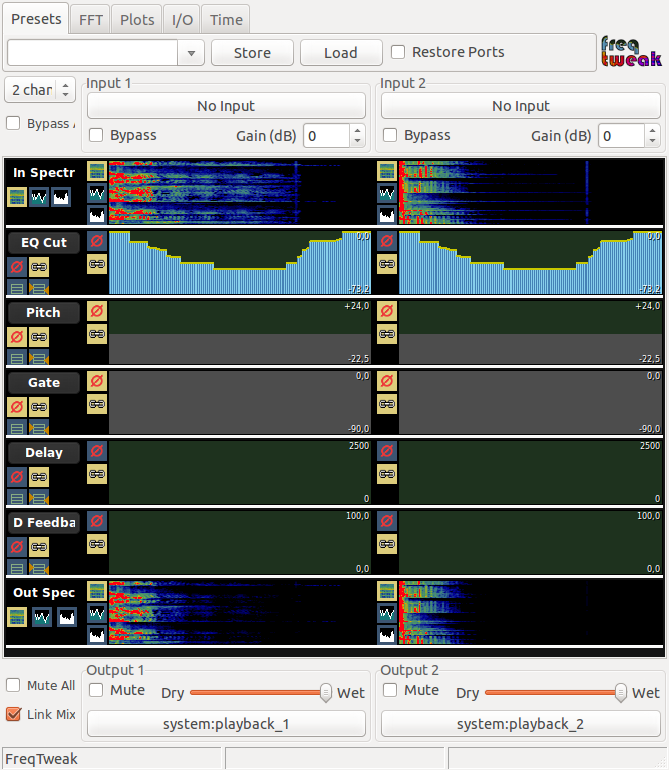
$ freqtweak &
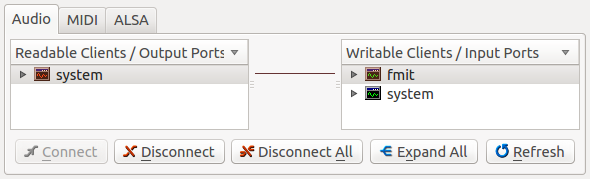
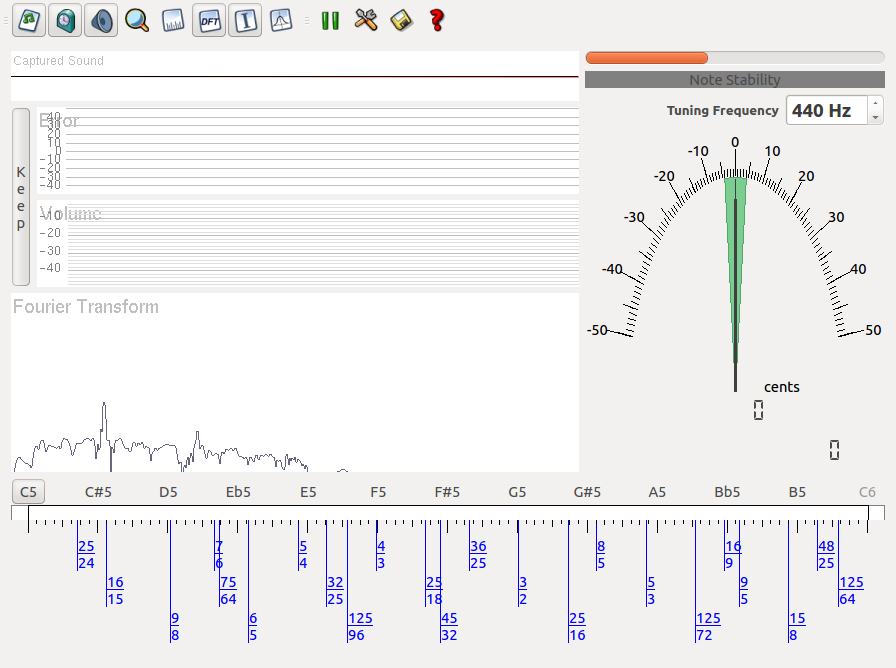
fmit &
Chapter 6
Edition
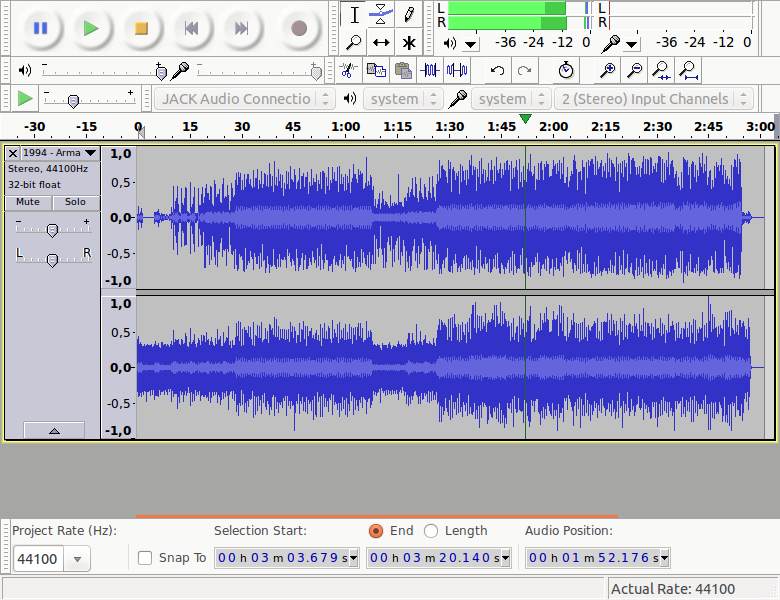
6.1 Audacity: capture and edit audio
# Note: usually audacity establish the connections when playing.
$ audacity &
Chapter 7
Capture
$ timemachine &
Chapter 8
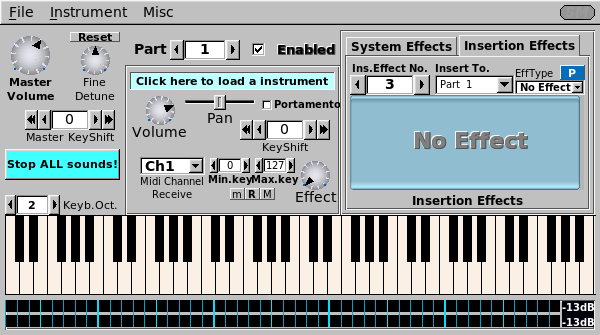
Synthesis
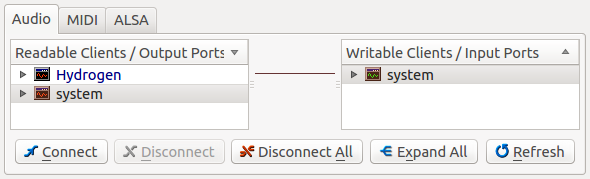
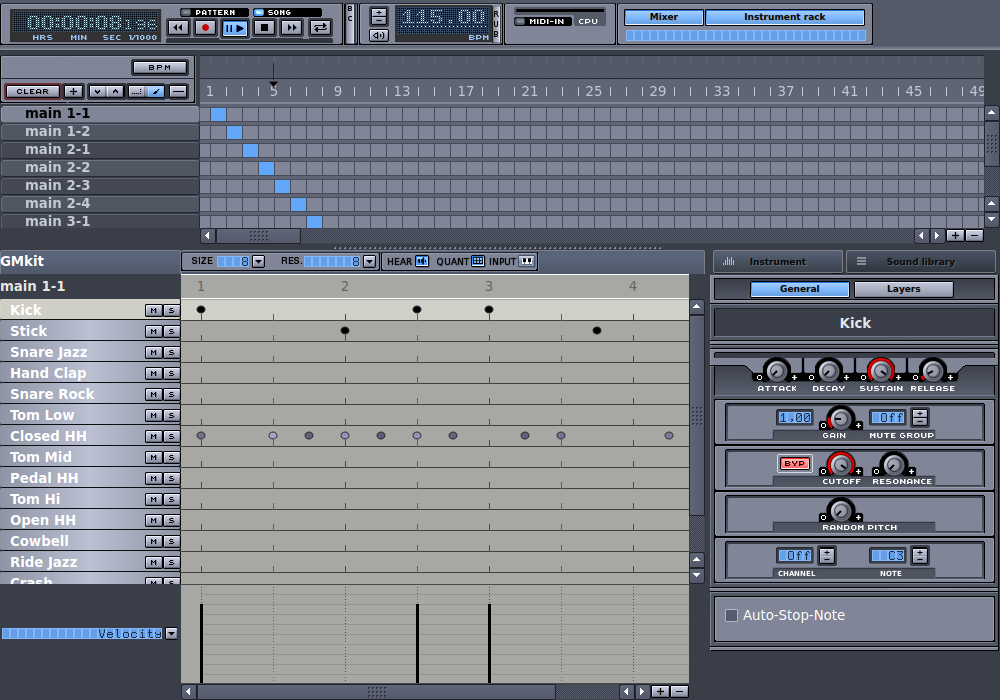
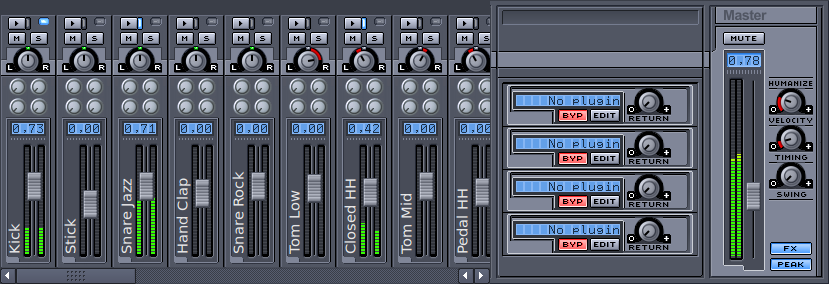
8.1 The Hydrogen drum machine
$ hydrogen &
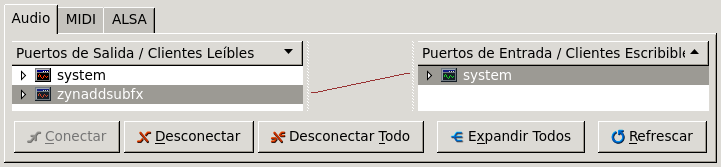
zynaddsubfx &
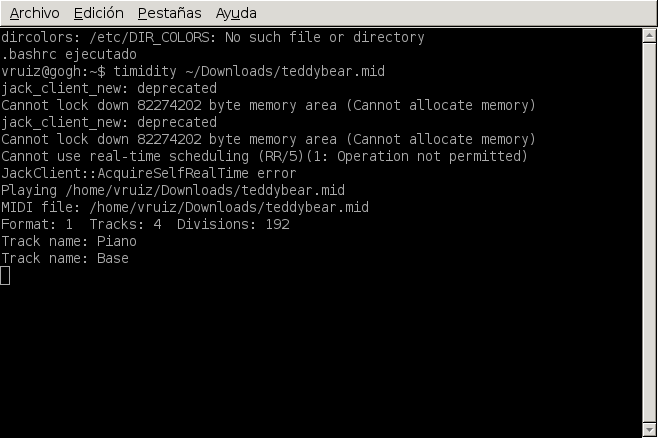
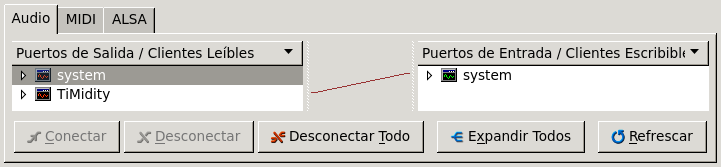
timidity ~/Downloads/teddybear.mid
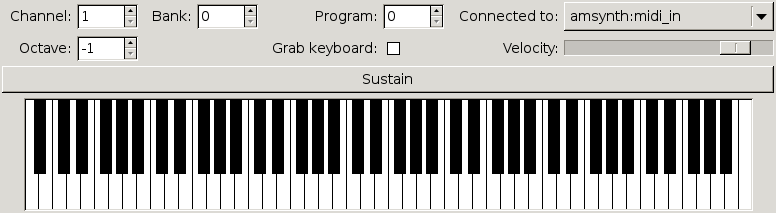
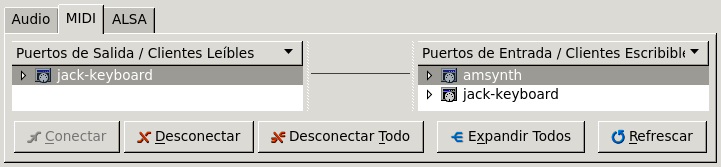
jack-keyboard &
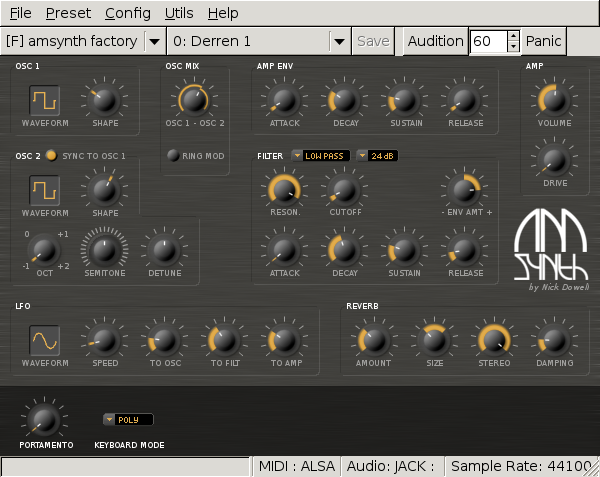
amsynth &
Chapter 9
Remember
- While the modules module-jack-source and module-jack-sink are
loaded into Pulseaudio, the JACK server is automatically started.
- To avoid this, remove these modules from the file
/etc/pulse/default.pa.